How to Create a Gallery Wall: Step-by-Step Layout Guide 2026
A gallery wall is one of those projects that looks effortless in magazine photos and feels impossible in real life. You buy the prints, hold them up to the wall, move them around for an hour, put three nails in the wrong spot, and end up with a crooked arrangement that haunts you every time you walk past it. The secret that interior designers know and rarely share is that a great gallery wall is not about having an artistic eye. It is about following a system. The layout is planned on the floor before anything touches the wall. The spacing follows a formula, not a feeling. And the hanging uses a paper template method that eliminates guesswork entirely. This is your complete step-by-step guide to creating a gallery wall that looks professionally designed, even if the closest you have ever come to interior design is rearranging the fridge magnets.
What You Need Before You Start
Tools
Tape measure
Pencil
Painter's tape or masking tape
Craft paper, newspaper, or large paper bags
Scissors
Level (phone level app works fine)
Hammer and nails (or adhesive hooks for damage-free hanging)
Your Prints
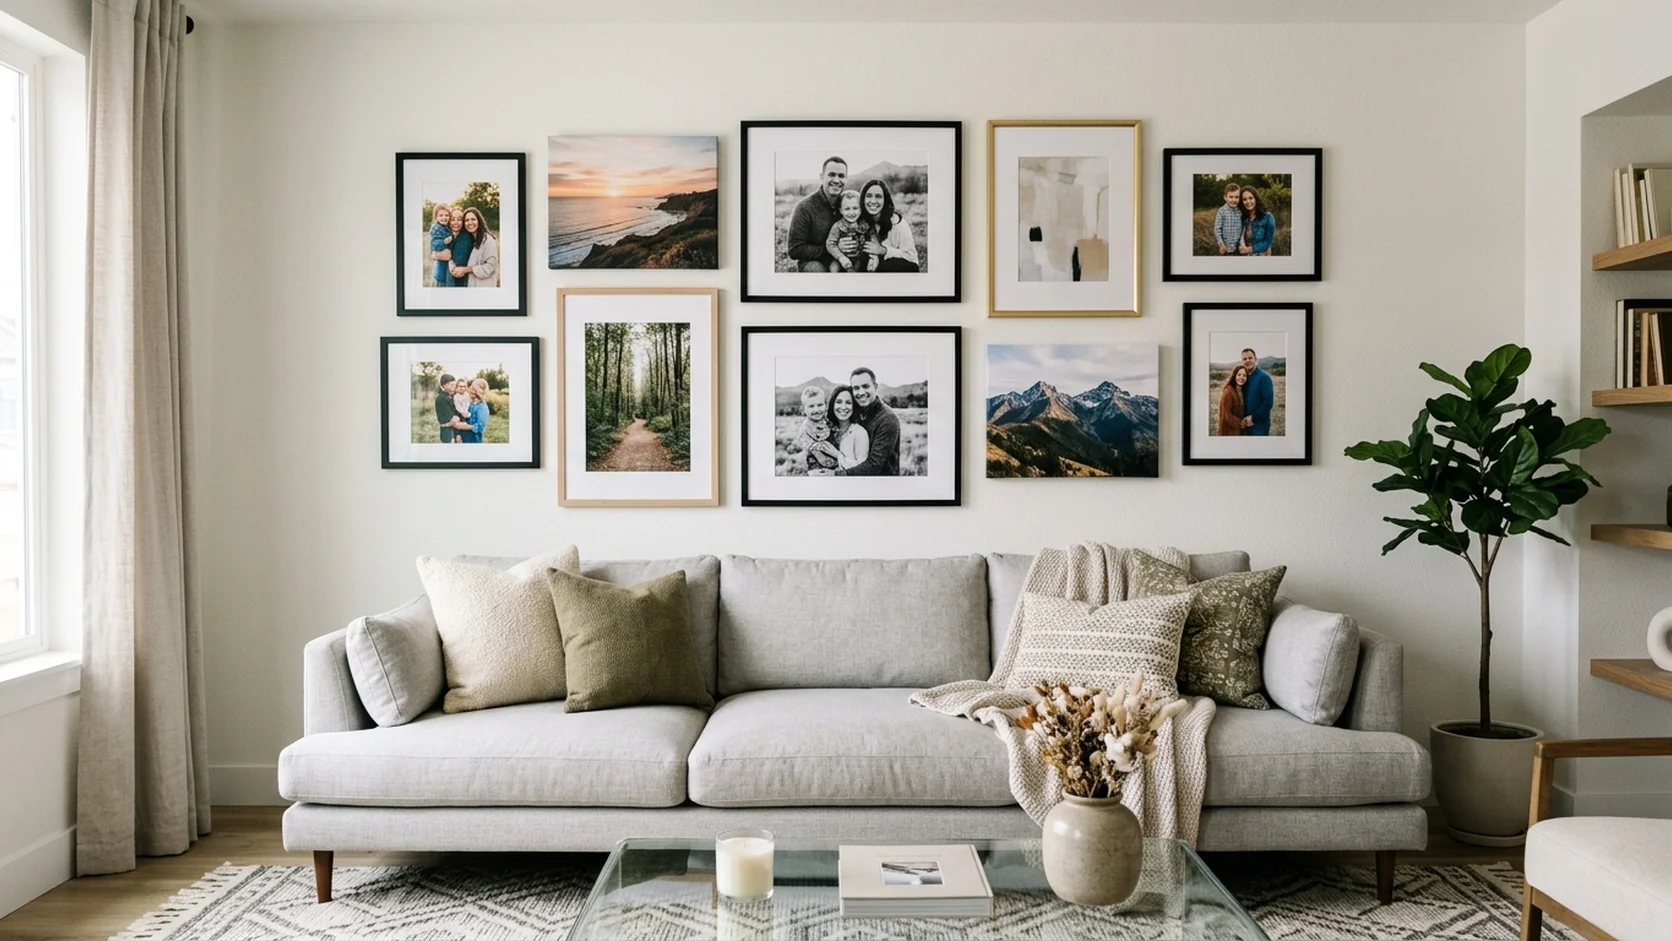
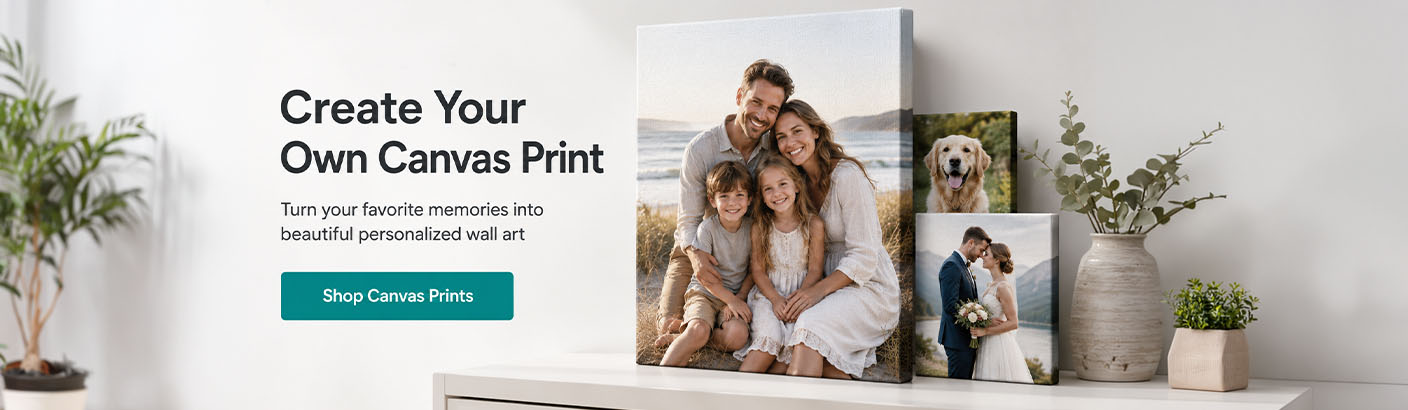
5 to 12 pieces is the sweet spot for most gallery walls. Fewer than five looks sparse. More than twelve gets chaotic unless the wall is very large. Mix at least two different sizes for visual interest. Consider mixing formats: canvas prints, framed prints, and MixPix tiles work beautifully together.
Step-by-Step: Building Your Gallery Wall
Choose Your Wall and Measure the Space
Measure the width and height of the available wall area. If hanging above furniture (a sofa, console, or bed), measure the furniture width too. Your gallery wall should be roughly two-thirds the width of the furniture below it and no wider than the furniture itself. Mark the boundaries with small pieces of painter's tape so you can see the available space at a glance.
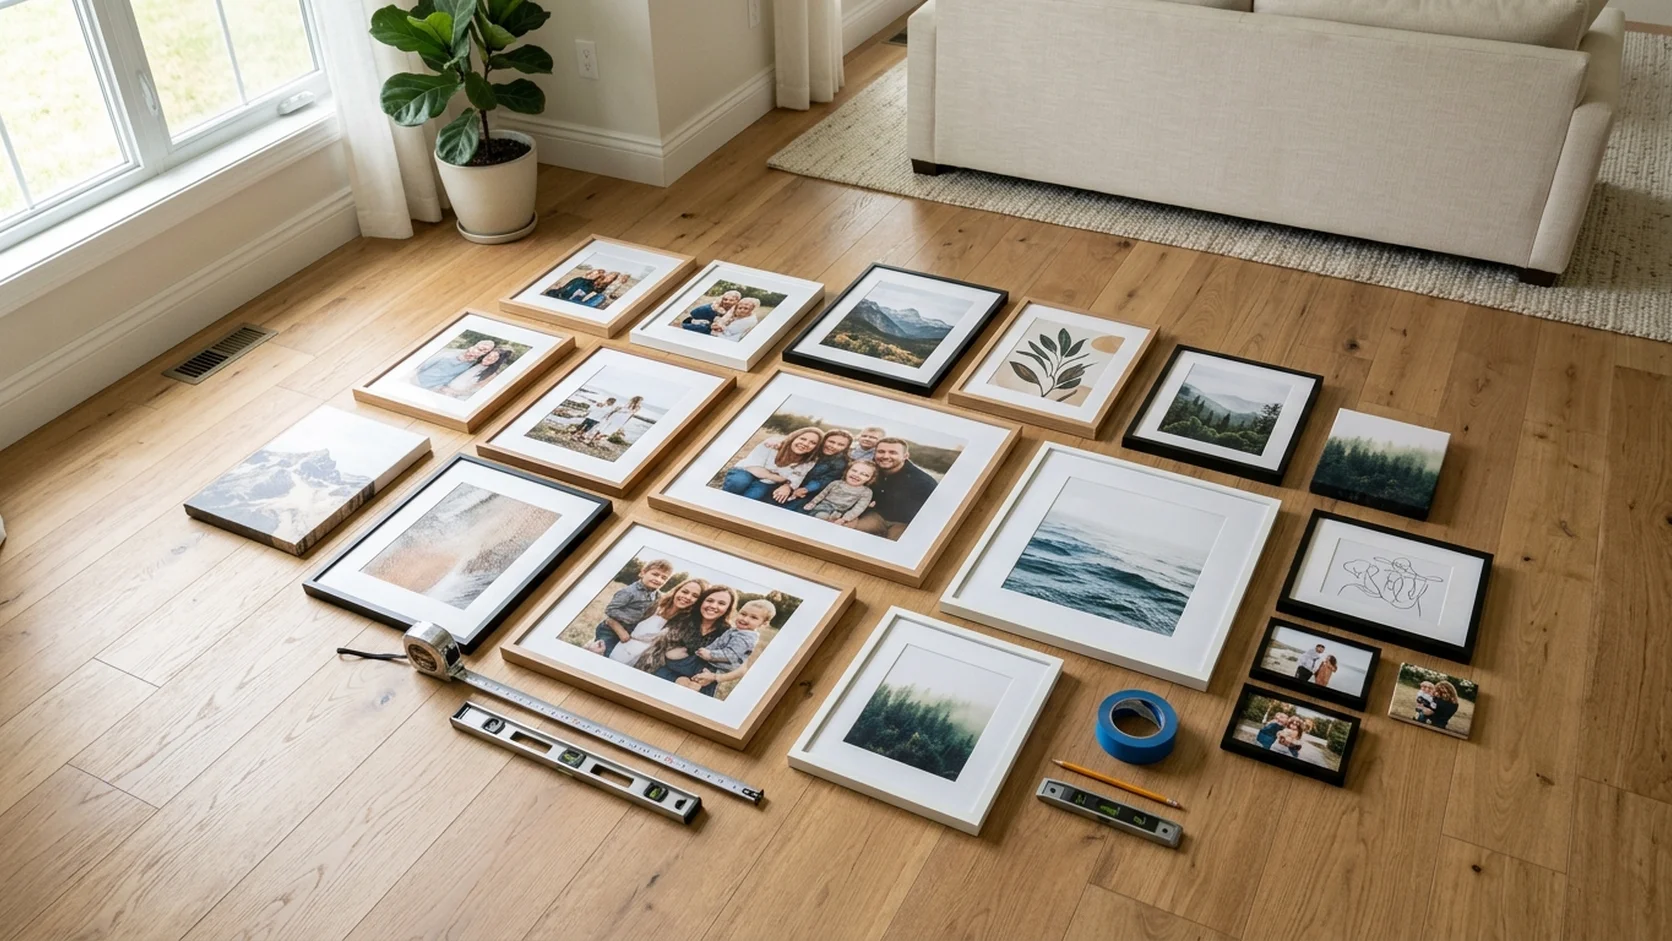
Lay Everything Out on the Floor First
This is the most important step and the one most people skip. Clear a floor area the same size as your wall space. Arrange all your prints on the floor within that area. Move them around, swap positions, try different groupings. The floor is free. The wall is not. Spend twenty minutes here and save yourself an hour of re-hanging later. Take a photo of the final arrangement with your phone so you have a reference.
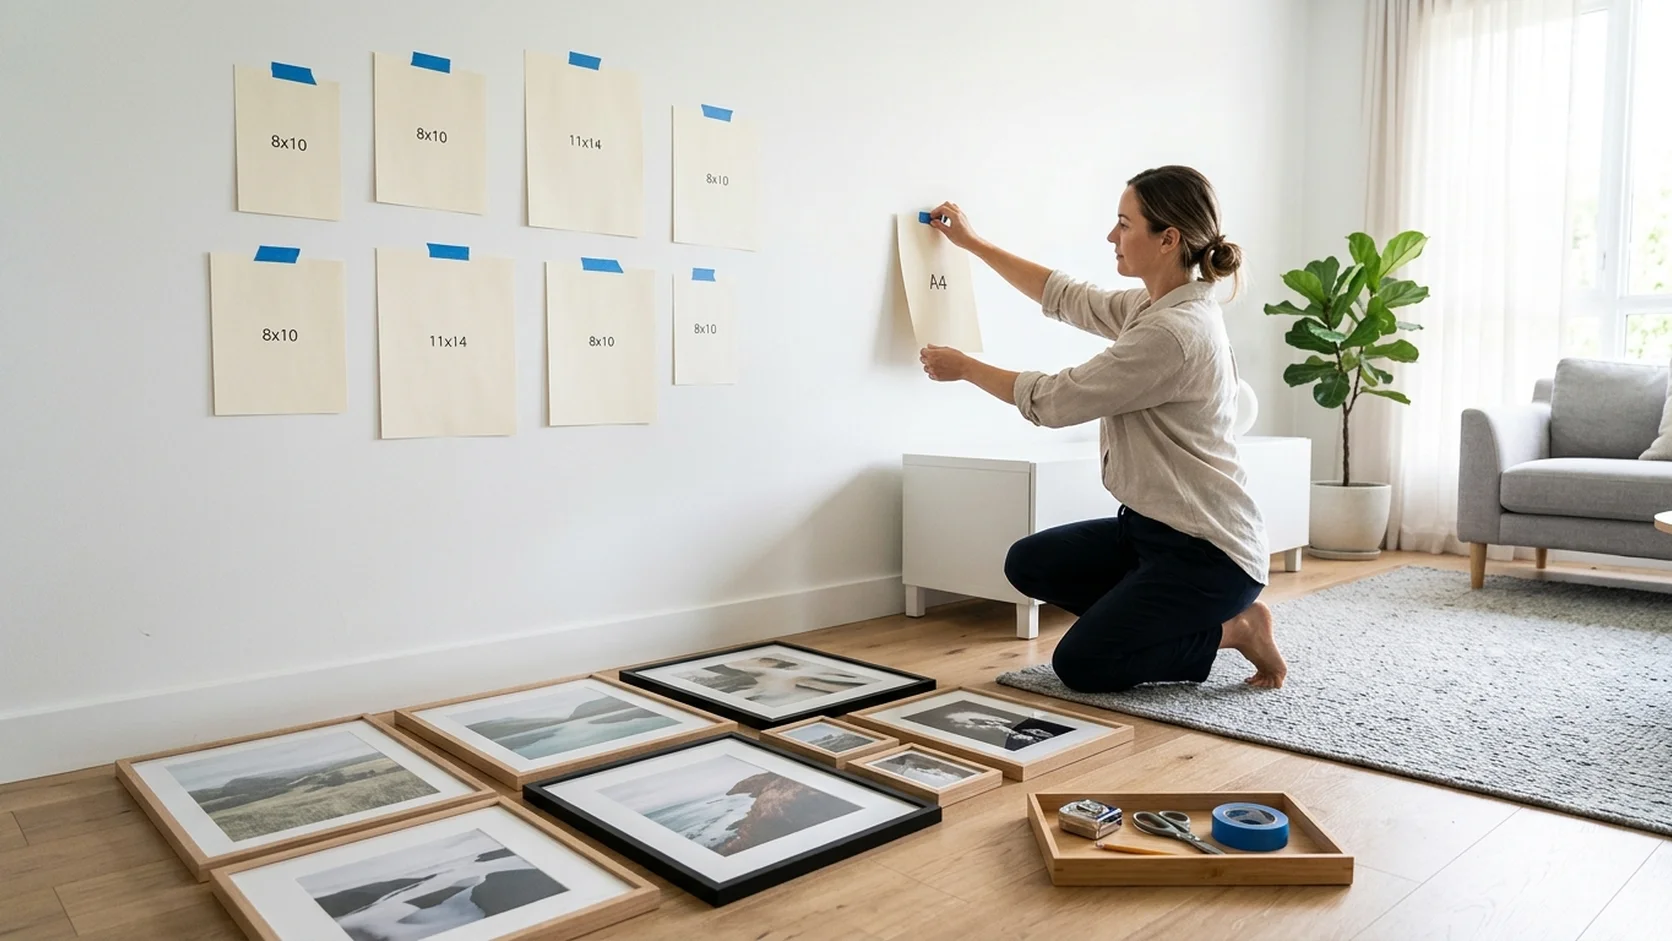
Create Paper Templates
Trace each print onto craft paper, newspaper, or a paper bag. Cut out each template. Write the print name on the paper so you know which piece goes where. This step takes ten minutes and it is the difference between a professional result and a wall full of unnecessary nail holes.
Tape the Templates to the Wall
Using painter's tape, stick each paper template to the wall in the arrangement you planned on the floor. Step back and look. Walk to the other side of the room and look. Sit on the sofa and look. Live with the paper templates for a few hours or even overnight. Adjust anything that feels off. This is your last chance to change the layout before committing nails. The center of your gallery wall should sit at approximately 57 to 60 inches from the floor (eye level).
Mark the Nail Points
With the templates still on the wall, measure where each nail or hook needs to go. For framed prints, measure the distance from the top of the frame to the hanging wire or bracket when held taut. Mark that point through the paper template with a pencil. For canvas prints, the hanging hardware is usually centered near the top. For photo board prints and lighter pieces, adhesive hooks work well and leave no holes.
Remove Templates and Hang
Remove the paper templates one at a time. Drive the nail or apply the hook at the pencil mark. Hang the corresponding print. Use a level (or your phone's level app) to ensure each piece is straight. Work from the center outward: hang the largest or most central piece first, then work outward to the edges. This ensures the core of the gallery wall is solid before you fine-tune the periphery.
Step Back and Adjust
Once everything is hung, step back to the normal viewing distance. Check alignment, spacing, and overall balance. Small adjustments are normal. A piece tilted half a degree is invisible up close but obvious from across the room. Take your time with the final leveling. Then take a photo. You earned it.
Popular Gallery Wall Layouts
The layout you choose sets the personality of the entire wall. Here are the five most reliable patterns, each with a different visual effect.
Grid Layout
Equal-sized prints in a perfectly aligned grid. Rows and columns with identical spacing. Clean, modern, minimalist. Best for matching prints like a photo series or a set of same-size canvas prints.
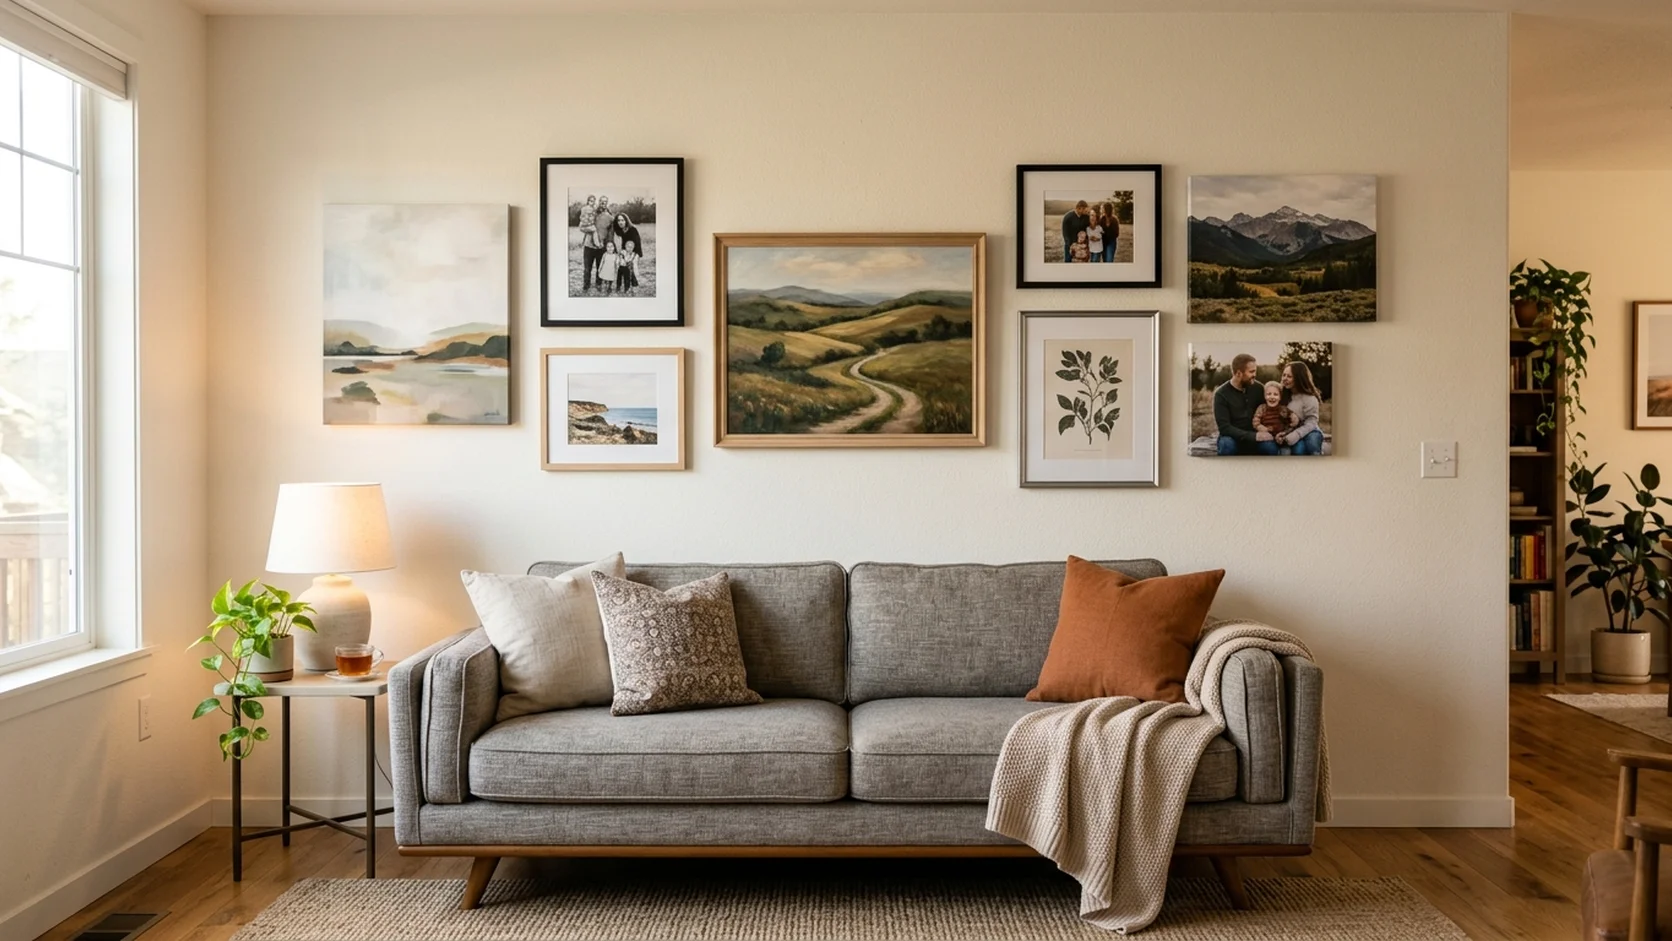
Salon Style
Mixed sizes and frames arranged organically. No rigid alignment. The most common gallery wall style and the most forgiving for beginners. Eclectic, personal, and visually dynamic. Works with any mix of formats.
Centerline
All pieces share a common horizontal center line, with tops and bottoms extending to different heights. Structured but not rigid. Great for hallways and spaces where you want order without a formal grid.
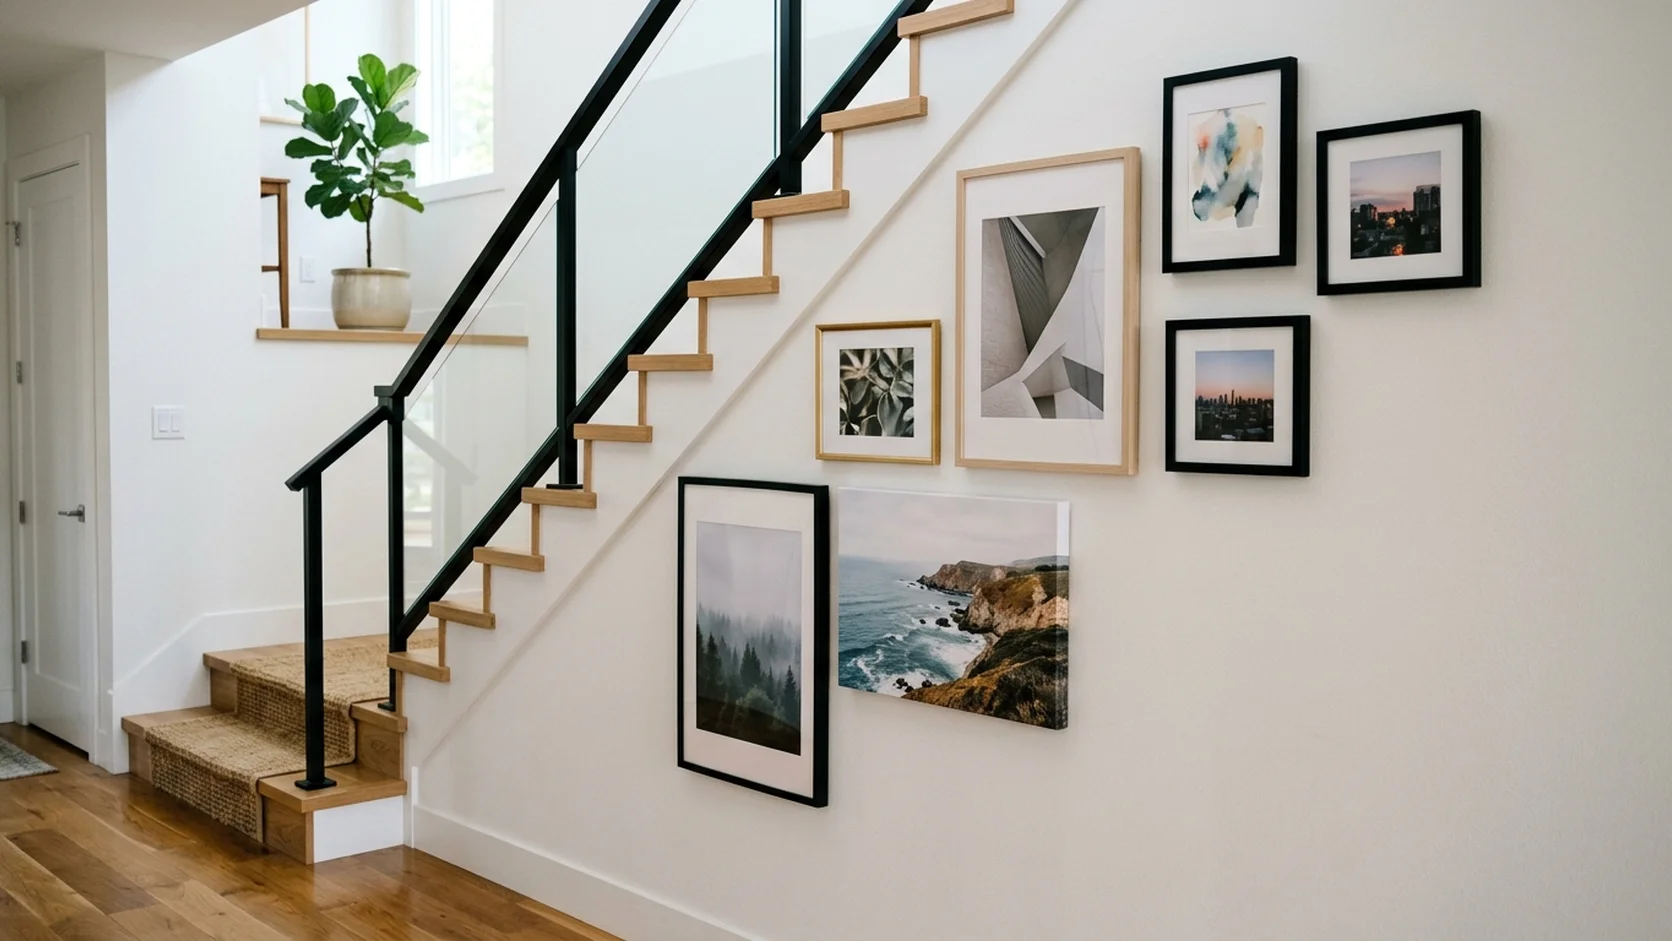
Staircase
Prints follow the diagonal line of a staircase. Each piece steps up with the stairs. Transforms a blank stairwell into a visual journey. Use 5 to 8 small to medium pieces for the best result.
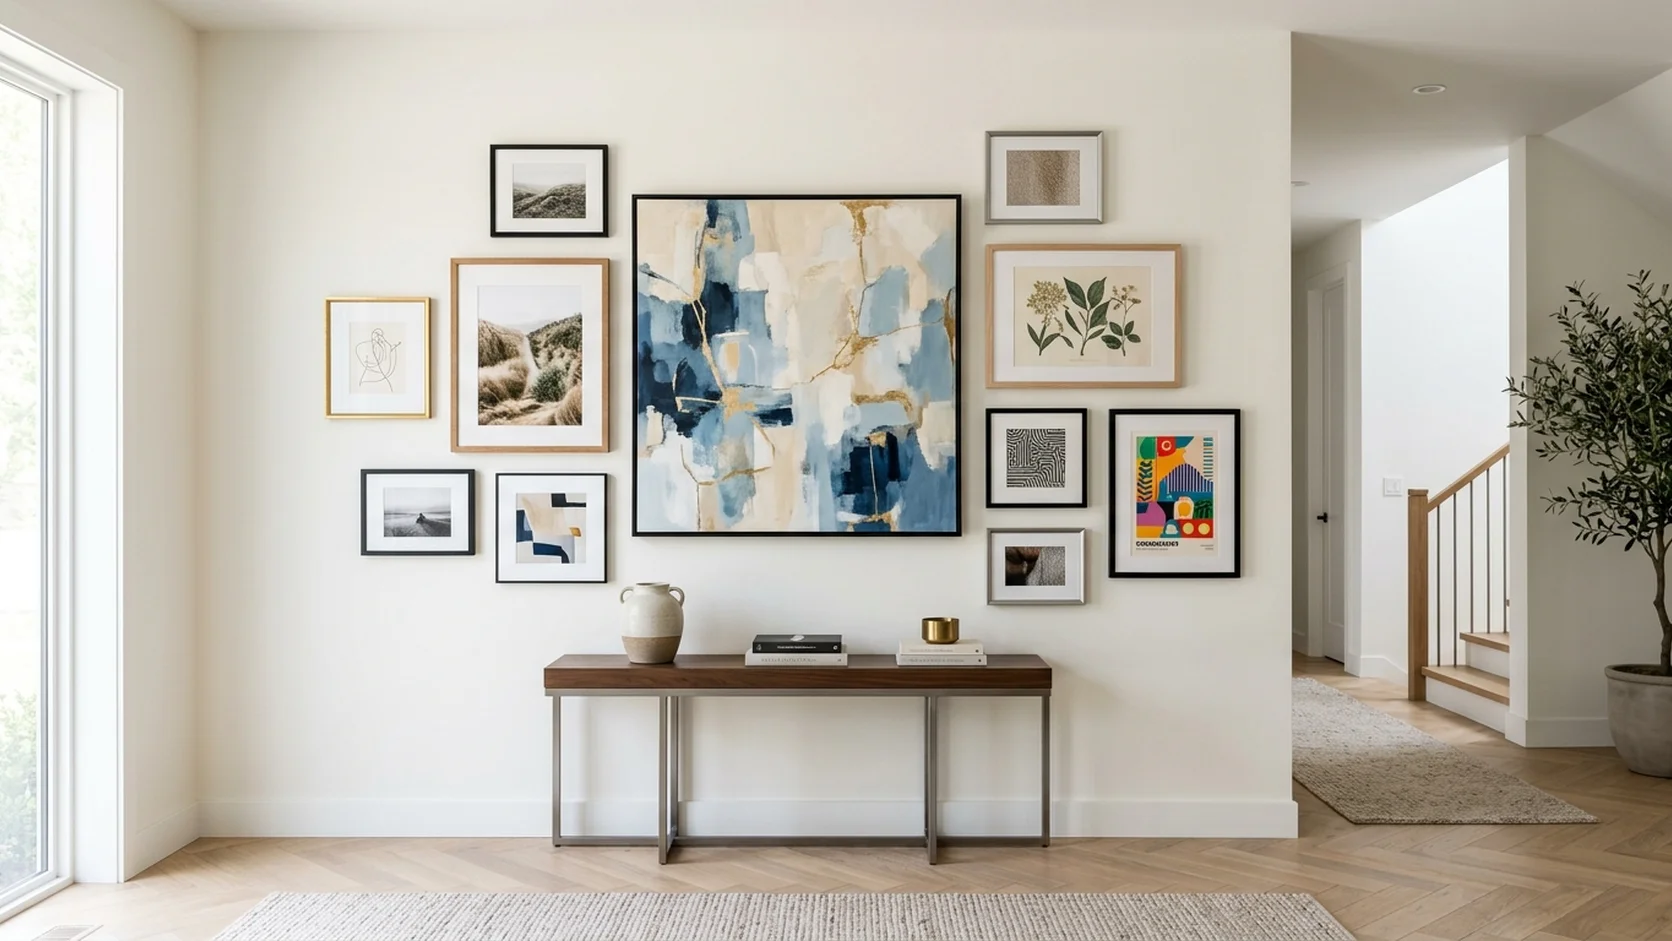
Anchor + Satellites
One large centerpiece surrounded by smaller prints. The anchor piece (a big collage canvas or large single canvas) draws the eye first. Smaller pieces orbit around it. Dramatic and balanced.
Spacing Rules That Work Every Time
The Spacing Cheat Sheet
Between prints: 2 to 3 inches is the standard for most gallery walls. Tighter spacing (1.5 inches) creates a cohesive, intentional look. Wider spacing (4+ inches) makes each piece feel more independent.
Above furniture: Leave 6 to 8 inches between the top of the sofa, console, or headboard and the bottom of the lowest print.
Eye level center: The center of the overall gallery wall arrangement should sit at 57 to 60 inches from the floor. This is museum standard and it works in every room.
Outer margins: Leave at least 3 to 6 inches between the edges of the gallery wall and any adjacent wall corners, doorframes, or ceiling lines. The gallery wall needs breathing room.
Consistency: Whatever spacing you choose, keep it consistent across the entire arrangement. Uneven gaps are the single most common reason gallery walls look "off."
Choosing Prints for Your Gallery Wall
The best gallery walls mix sizes, subjects, and sometimes formats. A large landscape canvas print as the anchor, surrounded by smaller portraits, candid family shots, and maybe one abstract or graphic piece for contrast. Mixing framed prints with unframed canvases adds textural variety. Adding a few MixPix photo tiles to the arrangement gives you pieces you can swap out seasonally without rehanging anything.
For color cohesion, choose photos that share a general color palette, even if the subjects are different. A gallery wall where every photo has warm tones (golds, ambers, soft greens) will feel unified. A gallery wall that mixes warm and cool tones randomly can feel chaotic. You do not need to be obsessive about it, just intentional.
A canvas wall display (a multi-panel set) can serve as the anchor of a larger gallery wall. It provides a strong visual center while smaller individual pieces fill out the surrounding space. For acrylic prints, use them sparingly as accent pieces: their glossy surface catches light differently than canvas, which creates visual depth. For more ideas on choosing canvas art for specific rooms, see our guide on canvas pictures for the living room.
The Five Most Common Gallery Wall Mistakes
1. Skipping the floor layout. Going directly from box to wall guarantees extra holes and crooked arrangements. Always plan on the floor first.
2. Spacing too wide. Large gaps between prints make them look like unrelated objects rather than a unified display. Keep gaps at 2 to 3 inches maximum.
3. Hanging too high. If you have to tilt your head up to see the center of the gallery wall, it is too high. Eye level (57 to 60 inches) is the target.
4. All the same size. A grid of identical sizes works deliberately. An accidental collection of same-size prints looks like a school hallway. Mix at least two sizes.
5. Not stepping back. Gallery walls look completely different from up close versus from across the room. Always evaluate from the normal viewing distance, not from two feet away with a hammer.

Conclusion
A gallery wall is not a talent. It is a process. Measure the space. Plan on the floor. Make paper templates. Tape them to the wall. Live with them. Adjust. Then hang, starting from the center and working outward. The paper template method alone eliminates ninety percent of the frustration that makes people give up halfway through. Combined with consistent spacing and a layout that matches the wall shape, the result is a gallery wall that looks like a professional installed it. Pick your photos, choose your prints, and give your wall the display it has been waiting for.
Frequently Asked Questions
Five to twelve pieces is the sweet spot. Fewer than five can look sparse. More than twelve risks visual overload unless the wall is very large. Start with five to seven and add more over time if desired.
Two to three inches between prints is standard. Keep the spacing consistent across the entire arrangement. For a tighter, more cohesive look, use 1.5 inches. Wider than 4 inches makes the prints feel disconnected.
Salon style (mixed sizes, organic arrangement) is the most popular and most forgiving for beginners. Grid layout works well with matching prints. The anchor-plus-satellites pattern creates a dramatic focal point.
Yes, and it often looks better than using a single format. Mixing canvas, framed prints, and photo tiles adds textural depth. Keep the color palette and subject matter cohesive for a unified look.
Use the paper template method: trace each print onto paper, cut out the templates, tape them to the wall, and mark the nail points through the paper. This eliminates guesswork and means each print needs only one nail hole.