Photo Tiles & Polaroid Wall Display: The Renter's Guide to Damage-Free Photo Decor
Forty-four million American households rent. Millions more live in dorms, just-painted homes or kids' rooms that get redone every couple of years. And almost all of them want photo decor that doesn't end with a security deposit dispute and a wall full of patched holes.
Photo tiles and polaroid walls solve that problem. They go up without nails, come down clean, and look as polished as anything you'd buy framed. This guide answers the questions you're actually searching — what photo tiles are, how they stick, what a polaroid wall really is, how to plan and hang one, and which format mix gives you a wall that looks intentional instead of improvised.
No drilling required. No deposit on the line. Just a wall that finally looks like yours.
What are photo tiles?
A photo tile is a small, rigid, custom-printed panel — usually square, usually around 8x8 inches — that mounts on the wall without nails or screws. Each tile holds a single photograph printed at high resolution on a flat, sturdy surface.
They're meant to be moved. That's the whole point. You can rearrange them, swap them out, take them down at move-out, and the wall stays untouched.
How do photo tiles stick to the wall?
Three common systems, depending on the brand:
- Magnetic plus adhesive: a small adhesive disc bonds to the wall once. The photo tile snaps onto the disc with a hidden magnet. You rearrange or replace tiles freely without touching the wall again.
- Peel-and-stick adhesive: the tile itself has a sticky backing. You press it directly to the wall. To rearrange, you peel the tile off and re-stick — the adhesive may need replacing after a few moves.
- Magnetic surface kits: you stick a thin magnetic-receptive panel to the wall, then attach magnet-backed tiles. Useful for very flexible rearranging, but the panel itself is visible at the edges.
Our own version, MIXPIX® photo tiles, uses the magnetic plus adhesive Magnofix® system — the disc stays on the wall, the lightfoam tile lifts off cleanly any time you want to swap it. The tile is rigid, lightweight (about 4 ounces), and printed at full resolution so phone photos look sharp at typical viewing distance.
How big are photo tiles?
8x8 inches is standard. Some brands offer 10x10 or 4x4 sizes. Square works well because it crops most phone photos cleanly and mixes easily with rectangles in a layout.

What's a polaroid wall?
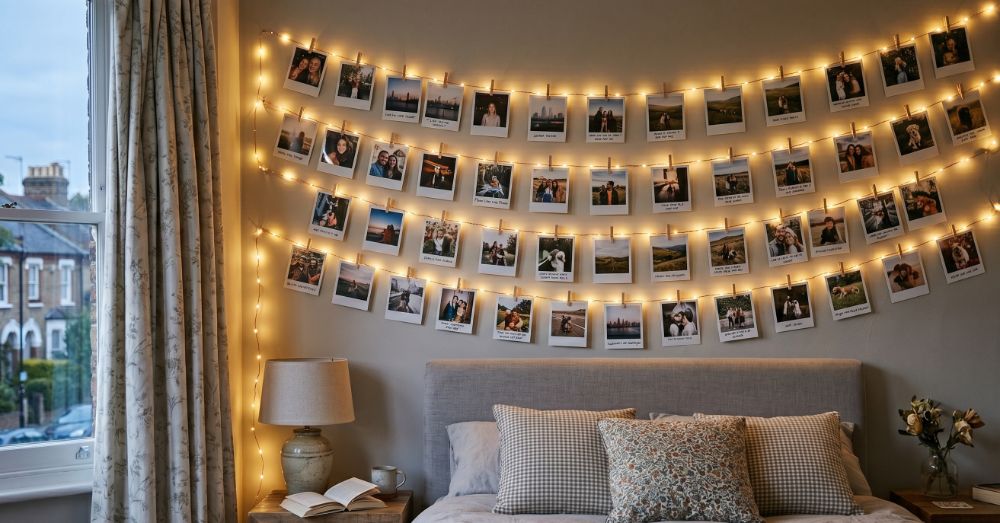
A polaroid wall is a cluster — usually dozens, sometimes a hundred or more — of small square prints with the recognizable thick-bottom border, arranged on a wall in clusters, hearts, grids or scattered constellations. The look comes from the early-2010s Tumblr aesthetic and never quite went away. It's still one of the most-saved styles on Pinterest.
Do you need a polaroid camera?
No. Most polaroid walls today don't use real instant-camera film. They use regular phone photos printed in the polaroid format — a 3x3 inch square image with a thicker bottom border, often ordered in batches of 50 or 100 from photo print services. The look is identical, the cost is lower, and the prints don't fade as fast as real instant film.
What do people use to stick polaroids to walls?
- Washi tape (a low-tack decorative paper tape) — the standard, comes off cleanly
- Removable putty (sometimes called museum putty or poster putty) — invisible from the front
- Mini wooden clothespins on string strung between two hooks — the dorm-room classic
- Sticky tabs (3M-style, the small kind) — held up well for posters, fine for paper prints
Avoid Scotch tape, masking tape, double-sided tape and Blu Tack on painted walls. All four can lift paint when removed, especially after a few months.
Photo tiles vs polaroid wall: which one should you pick?
They solve overlapping problems but in different ways. Here's a side-by-side.
| Feature | Photo tiles | Polaroid wall |
|---|---|---|
| Typical size | 8x8 inches per tile | 3x3 inch print, with white border |
| How it sticks | Adhesive disc plus magnet, or peel-and-stick | Washi tape, removable putty, or string and clothespins |
| Print quality | High-resolution photo print on rigid panel | Standard photo paper, fades over time in direct sun |
| Rearranging | Lift off the magnet and reposition — seconds | Peel tape carefully and re-stick — risk of paint lift |
| Cost per piece | Higher per tile (custom panel) | Lower per print (paper) |
| Lifespan | Years — rigid panel, won't curl or fade indoors | 12 to 24 months before tape loosens or paper yellows |
| Best for | Long-term display, anchor pieces, larger walls | Inexpensive volume, playful clusters, dorms |
The honest answer: most people who care about how the wall looks long-term mix both. Photo tiles do the structural work — bigger, sharper, longer-lasting. Polaroid prints add scattered texture that's cheap and easy to swap as your year unfolds. Pick one alone and the wall feels either too formal or too flimsy.
10 photo tile and polaroid wall ideas worth copying
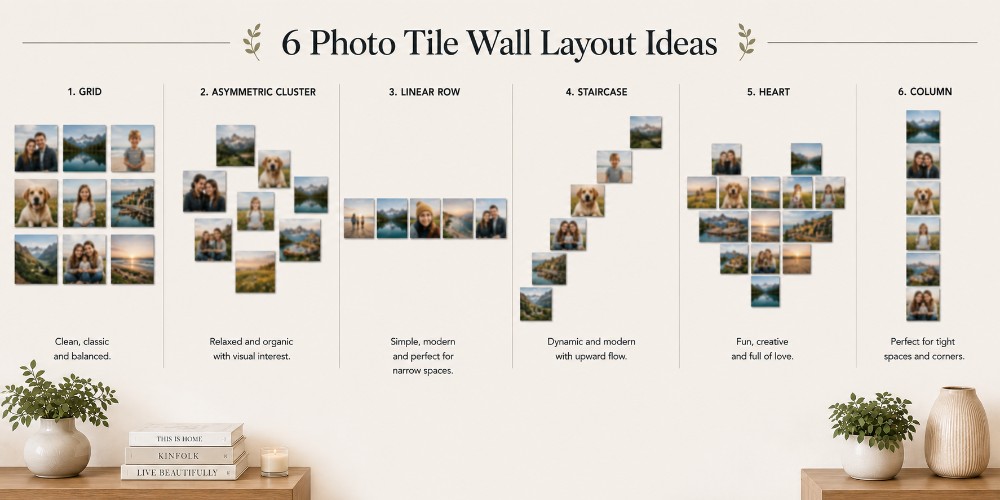
Each of these works in real US homes. None of them require drilling. Pick the one that fits your wall and your photo library.
1. The 3x3 grid above the bed
Nine square photo tiles in a perfect 3x3 grid, hung directly above a queen or king bed. Coverage area is about 28x28 inches with 2-inch gaps. Works best as a single-subject set — nine photos of the same trip, the same person, or the same year. Looks especially clean when all nine are converted to black-and-white.
2. The polaroid heart cluster
Twenty to forty polaroid-style prints arranged in the outline of a heart, taped with small strips of washi tape. The classic teen and dorm-room look, and surprisingly powerful in any small room when done with care. Use a paper template under the prints to keep the heart shape clean — eyeballing it never works.
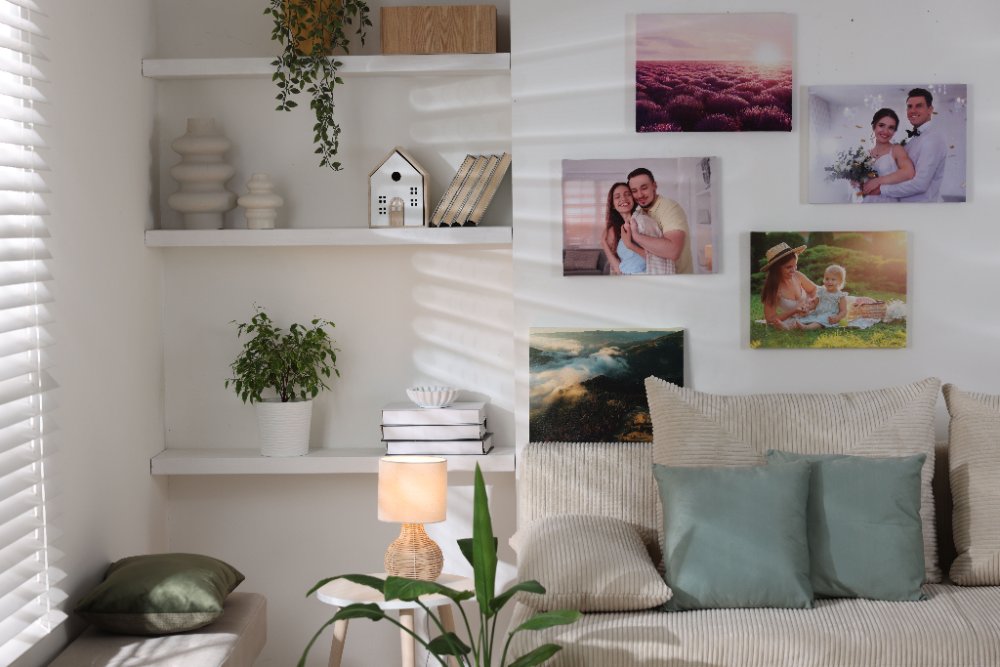
3. The above-sofa anchor with grid plus scatter
One large canvas print — say 16x20 or 20x30 inches — sits slightly off-center above the sofa. To one side, a 3x3 grid of photo tiles. To the other, a looser scatter of 10 to 15 polaroid prints. The combination of geometric grid and organic scatter is the most-photographed style of the modular-wall era for a reason: it has weight where it needs weight and softness where it needs softness.
4. The dorm tension-rod string display
Wedge a tension rod between two close walls (a closet alcove, a corner, between two pieces of furniture). String fishing line or twine across. Clip 30 to 50 polaroid prints to the line with mini wooden clothespins. Zero wall contact, zero RA inspections to fail, infinite rearranging. The dorm-room workhorse.
5. The hallway timeline
A single horizontal row of 5 to 9 mixed-format pieces — a tile, a tile, a small framed print, a tile, a Forex® panel, a tile — all hung at the same center height, running the length of a hallway. The row reads as a deliberate timeline. Particularly strong in narrow hallways where vertical photo arrangements would feel cramped.
6. The kitchen mood wall
A small cluster of photo tiles and polaroid prints in a kitchen — but specifically themed around food, family meals, recipes, the people who cooked them. Photos of grandma's hands kneading dough. The first time you tried sourdough. The farmer's market in summer. Keep it small (around 24x24 inches total) so it doesn't compete with the rest of the kitchen.
7. The narrow stairwell column
A vertical stack of 4 to 7 mixed-format pieces, top to bottom, on a tall narrow staircase wall. Mix the formats freely (photo tile, polaroid cluster, photo tile, small framed print, photo tile) but keep the widths roughly consistent. Makes excellent use of awkward verticality that landscape art usually wastes.
8. The desk-side mood board
A 4x3 or 5x3 grid of photo tiles next to your desk, at sitting eye level. The trick: it's not a memory wall, it's a mood wall. Photos of places you want to go, projects you're aiming at, people who motivate you, the small visual cues that focus your day. Particularly good for home offices that double as bedrooms.
9. The black-and-white statement grid
Twelve to sixteen photo tiles in a tight 4x3 or 4x4 grid, all in black-and-white, all printed from the same source — one trip, one wedding, one year. The visual unity makes it feel curated rather than collected. Hang on a wall painted a single warm color — terracotta, deep green, dusty blue — and the grid pops against the color.
10. The seasonal swap wall
Twelve to sixteen photo tiles in any layout, but specifically built for rotation. Half the tiles are permanent anchors (family, the dog, the wedding photo). The other half rotate quarterly — winter holiday photos in December, spring travel in April, summer beach in July, fall foliage in October. The wall stays alive through the year instead of frozen in time.
How to plan your photo wall
Five things to do before you stick anything to the wall.
1. Pick the angle
Decide what story the wall tells. The year. The people. The places. The aesthetic. People who skip this step always end up with a wall that looks like a random scrapbook — beautiful pieces, no narrative.
2. Gather more photos than you'll need
Open your phone gallery and search by date or by face. Pull 60 to 80 photos at this stage even if you only plan to print 20. Cast wide first, edit down later. Don't forget to check shared albums, old laptops and friends' camera rolls — your best wall photos are often ones other people took of you.
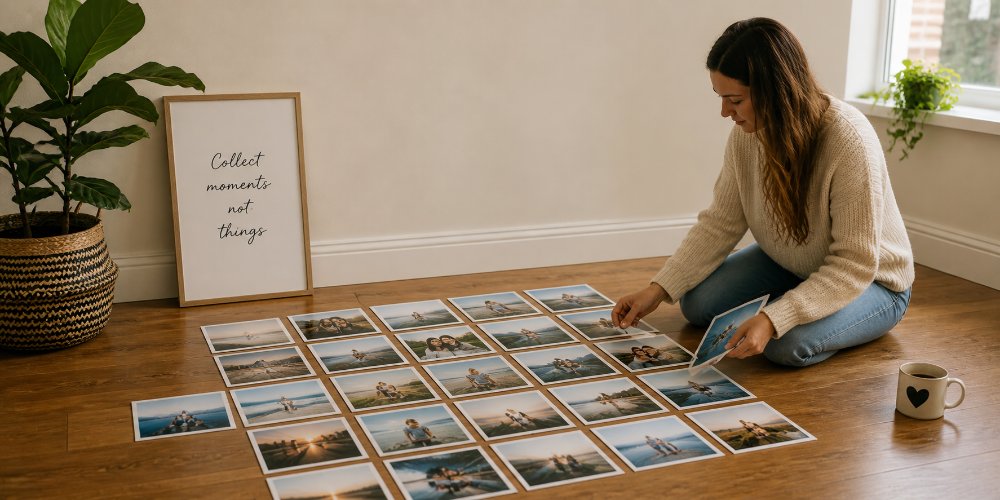
3. Use paper templates before you commit
If you want a bigger library of layouts to work from before you settle on yours, our 100+ gallery wall ideas guide walks through 100+ layouts across rooms and styles, with template sizes for each.
4. Measure twice
Two numbers to remember:
- Center your arrangement at 57 inches from the floor — the standard gallery height, the natural eye level for most adults.
- Span roughly two-thirds of the furniture below — a 7-foot sofa wants an arrangement around 4.5 to 5 feet wide; a queen bed (60 inches) wants around 40 inches; a 4-foot console wants around 32 inches.
5. Order, then commit
Once the paper templates feel right, take photos of the wall (so you have a reference), then place the order. Photo tiles ship in a few days. Polaroid-format prints from most services ship in under a week. Most modern smartphone photos enlarge well to 8x8; heavily zoomed shots from far away rarely do.
How to hang photo tiles and polaroid pictures without damaging walls
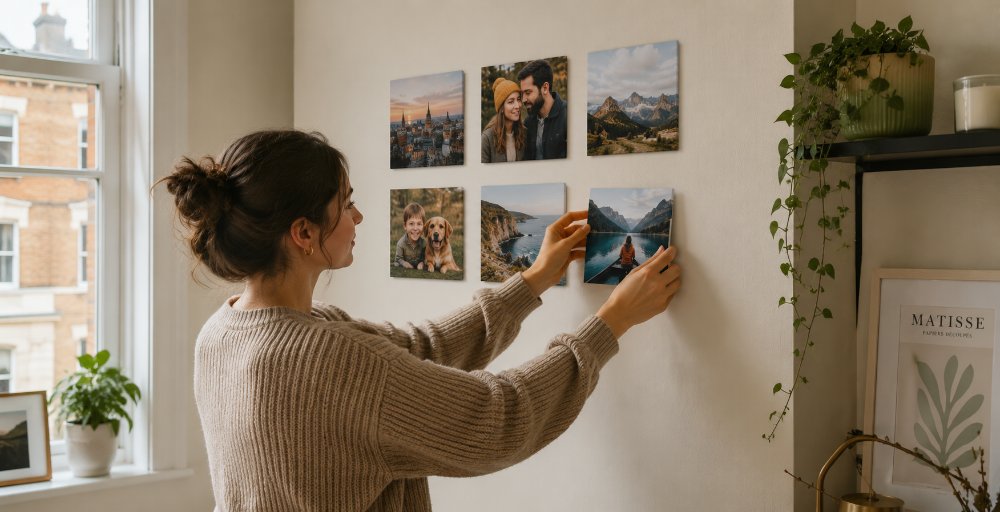
American homes vary more than people realize. The hanging method that's perfect on smooth painted drywall might fail completely on a cinder block dorm wall or a 1920s plaster ceiling. Match the method to the wall.
Painted drywall (most US apartments built since the 1960s)
Easiest case. Almost every damage-free system works — adhesive discs, Command Strips, peel-and-stick. Wipe the wall first with a microfiber cloth and a dab of rubbing alcohol. Press for 30 seconds. Wait at least an hour before hanging anything heavier than a polaroid print.
Painted plaster on lath (many pre-1950s homes)
Trickier. Plaster is harder than drywall, and adhesive systems sometimes don't grip textured plaster surfaces well. Test on a small hidden area first. If your home has picture rails (a horizontal molding strip running about a foot below the ceiling, common in pre-1940s homes), use brass picture-rail hooks and steel wire — zero damage, infinite adjustability.
Cinder block (college dorms, basements)
Most adhesives fail on cinder block — it's porous and chalky. Three things actually work:
- Tension rods spanning a corner with string and mini clothespins (zero wall contact)
- Cinder-block-rated adhesive strips — read the package, generic strips usually fail
- Removable putty for individual polaroid prints (lightweight enough that it holds)
Popcorn ceilings and textured walls
Texture creates tiny air gaps under adhesive, so anything stuck to a heavily textured wall tends to fall after a few weeks. If you can, pick a smoother wall in the same room. If you can't, stick to lightweight pieces only — small photo tiles, polaroid prints, or a slim Forex® photo board panel that weighs almost nothing. A 12x16 inch Forex® panel weighs about a third of a similar canvas, which makes the difference between a piece that holds and one that doesn't.
Freshly painted walls (less than 30 days old)
Latex paint takes a full 30 days to fully cure — not the four hours the can claims. Stick anything adhesive to a wall painted within the last month and you stand a real chance of pulling paint off when you remove it. If your apartment was repainted right before you moved in, wait three to four weeks before mounting anything. Use a console table, mantel or floating shelf to lean prints against the wall in the meantime.
How to remove photo tiles and polaroid prints cleanly
The biggest cause of paint damage isn't the adhesive — it's the angle. Pull straight off the wall and you risk lifting paint. Pull slowly, parallel to the wall (so the adhesive peels rather than rips), and most systems come off without a trace. For Command Strips specifically, the package instructions show the right angle — follow them exactly.
Posters and lightweight paper prints follow similar rules. If you want the deeper guide on those, our piece on how to hang a poster covers each damage-free method in detail.
Sizing rules that fix nine out of ten photo wall mistakes
Three numbers to memorize:
- 57 inches center height. The middle of your arrangement should sit at 57 inches from the floor — standard gallery height. Most people hang things 3 to 6 inches too high.
- Two-thirds of furniture width. Whatever you put above a sofa, console or bed should span roughly two-thirds of the furniture's width. Smaller and the wall looks lost; bigger and the wall feels overcrowded.
- Consistent spacing of 2 to 3 inches between every piece. Pick one spacing and apply it across the whole wall — inconsistent gaps are what make amateur galleries look amateur.
Quick size cheat sheet
- Photo tiles: 8x8 inches each, in grids or scatters
- Polaroid-style prints: 3x3 inch image with the polaroid border
- Anchor canvas: 16x20 or 20x30 inches
- Anchor framed print: 11x14 or 16x20 inches
- Forex® or panel filler: 8x10 or 11x14 inches
Why mixing formats beats sticking to one
A wall of identical photo tiles, all the same size, all in a tidy grid, is fine. It's also a bit boring. The walls that get noticed mix at least three formats — different sizes, different finishes, different visual weights.
Each format does something the others don't:
- Photo tiles are the structural backbone — sharp, lightweight, easy to swap. They handle the bulk of the wall.
- Polaroid prints add small-scale texture and personality. Inexpensive enough to use in volume.
- Canvas prints are the soft anchor — slight texture, no glass reflection, perfect for portraits and atmospheric photos.
- Framed photo prints are the formal pieces — wedding portraits, milestone moments, the photos that earn the gravity of a mat and frame.
- Metal prints are the bold accent — saturated colors, a slight metallic sheen, used sparingly for one statement piece.
Use three formats minimum. Five if the wall is large enough to handle them. The trick is restraint — one piece per format does most of the work, with photo tiles and polaroid prints filling the rest.
Where each format earns its place
On a typical above-sofa wall (5 to 7 feet wide), the layered approach looks like this: a single metal print or canvas as the anchor (the piece you spot from across the room), a 3x3 grid of photo tiles to one side, two or three small framed prints scattered around the anchor for formal weight, and 8 to 12 polaroid-style prints filling the gaps. That's the formula.
6 mistakes that ruin photo walls (and how to avoid them)
1. Hanging everything too high
The most common mistake by far. The instinct is to hang photos above eye level, almost like a museum display. Sitting eye level on a typical sofa is around 44 to 48 inches; standing eye level is around 60 inches. A center height of 57 inches splits the difference for both.
2. Using one format for everything
A wall of identical 8x8 photo tiles, all the same size, looks like a coworking space. Mix at least three formats. Add at least one framed photo print with a clean white mat — the formality of a frame against the looser tiles is what tells the eye which pieces matter most.
3. Inconsistent spacing
Three inches between two pieces, an inch and a half between two others, four inches somewhere else — the eye reads it immediately as sloppy. Pick one spacing (2 inches for a denser feel, 3 inches for a calmer one) and apply it across the entire wall.
4. Skipping the paper template trick
Sticking pieces directly to the wall and hoping for the best. Almost nobody gets this right on the first try. Cut paper to size, tape it up, live with it for a day, then commit. The 30 minutes of paper templates saves you hours of regret.
5. Ignoring sun exposure
A south-facing wall in direct afternoon sun will fade paper-based prints (polaroids especially) within a year. Photo tiles and canvas hold up better, but even those start to fade after a few years of direct sun. Either pick a wall that doesn't get direct sun, or accept that paper prints will need replacing annually.
6. Filling every inch
Negative space — empty wall around the prints — is what makes a gallery feel curated rather than cluttered. Aim for prints to cover 60 to 70 percent of the wall, not 100 percent. Your eye needs places to land.
Keep the wall feeling current over time
Modular photo walls beat traditional gallery walls because they're built to evolve. Treat the wall as a living thing and it stays interesting. Treat it as a one-and-done project and it starts feeling dated within six months.
The seasonal swap
Every three months, swap out 3 to 5 of the smaller pieces. Anchor canvas and framed prints stay. Photo tiles and polaroid prints rotate. New road trip in March? One tile becomes a road trip shot. Halloween costume in October? A polaroid joins the cluster. This is where photo tiles really earn their keep — because the adhesive disc stays on the wall, swapping the tile takes seconds.
The annual edit
Once a year (late August or early January are natural reset points), take down 30 to 50 percent of the wall. Live with the negative space for a few days. Decide what wants to come back, what's done its time, and what new pieces deserve a permanent spot. If you want a faster shortcut to refresh a whole section, our pre-arranged multi-canvas wall displays come in 3-, 5- and 7-piece sets that give you a fresh anchor without needing to plan the layout from scratch.
The wall, finally
Photo tiles and polaroid walls solve the same problem from two angles. Photo tiles give you the polish — sharp, rigid, structured. Polaroid prints give you the personality — small, scattered, easy to swap.
Mix them. Add one or two anchor pieces. Get the spacing right. Hang at 57 inches. Use the paper template trick before you stick anything. Then let the wall change as your year does.
No nails. No deposit drama. Just a wall that finally looks like the place you actually live.
Frequently Asked Questions About Photo Tiles & Polaroid Walls
-
Most photo tiles use either a peel-and-stick adhesive that bonds directly to the wall, or a magnetic system in which an adhesive disc bonds to the wall once and the tile snaps onto the disc with a hidden magnet. The magnetic system is more flexible because you can rearrange tiles without re-sticking anything.
-
Quality photo tiles are designed to come off cleanly when removed slowly and at the right angle. Pulling straight off the wall risks lifting paint. Pulling slowly, parallel to the wall, peels the disc off without leaving a mark. Avoid sticking tiles to walls painted within the last 30 days or to heavily textured surfaces — both increase the risk of paint damage.
-
Three reliable methods: washi tape (low-tack decorative paper tape that comes off cleanly), removable putty (also sold as museum putty or poster putty), or a tension-rod string setup with mini wooden clothespins. Avoid regular Scotch tape, masking tape and Blu Tack on painted walls — all three tend to lift paint.
-
For a typical bedroom wall above a bed, 9 to 16 photo tiles (a 3x3 or 4x4 grid) covers the space well. For a living room wall above a sofa, 12 to 20 pieces in a mixed arrangement looks balanced. Anything fewer than 6 looks sparse on most walls; anything more than 25 needs to be salon-style to feel deliberate.
-
Three usual culprits: cheap tape (replace with washi tape or removable putty), humidity (avoid bathrooms and kitchens), and dirty walls (wipe with a microfiber cloth and rubbing alcohol before sticking). Press each piece firmly for 15 to 30 seconds. If prints keep falling, the wall surface is the problem — switch walls or switch to a magnetic system.
-
An 8x8 inch tile is roughly the size of a large coffee table book. Nine in a 3x3 grid with 2-inch gaps creates a 28x28 inch arrangement, which fits perfectly above a queen bed or in the center of a 5- to 6-foot-wide wall. Twelve in a 4x3 grid creates a 38x28 inch arrangement, suitable for wider walls.
-
For most US apartments and homes, yes. Peel-and-stick photo tiles work but need re-sticking every time you rearrange. Magnetic systems use one adhesive disc per tile, which stays on the wall, and the tile itself snaps on and off as many times as you want. If you suspect you'll move things around even once, go magnetic.
-
Yes. Modern smartphones from the last five years have plenty of resolution for 8x8 photo tiles, as long as the photos are well-lit and not heavily zoomed. Heavily-zoomed shots from far away rarely enlarge cleanly. For best results, use unzoomed wide shots and crop in software afterward.
-
Yes — the magnetic plus adhesive system is designed for rented walls. The adhesive disc removes cleanly, and the tile itself never touches the wall directly. Take photos of the walls before installation so you have a record of the original condition for move-out, and follow the manufacturer's removal instructions exactly.
-
Photo tiles indoors last for years — the rigid panel doesn't curl, and the print holds up well as long as the wall doesn't get hours of direct sun daily. Paper-based polaroid prints last 12 to 24 months before tape loosens or color shifts. Most people refresh polaroid clusters annually for that reason.